
Enabling user identification on a Palo Alto firewall can add useful functionality to your configuration. It will give additional visibility into user activity on your network providing granularity in your reports, creating an accurate picture of network activity. With user identification enabled, you can also create security policies based on users or groups in your environment. These security policies will allow better control of your network traffic across multiple devices.
To enable user identification in PAN-OS, you will want to start by creating a service account to be used with your firewall.
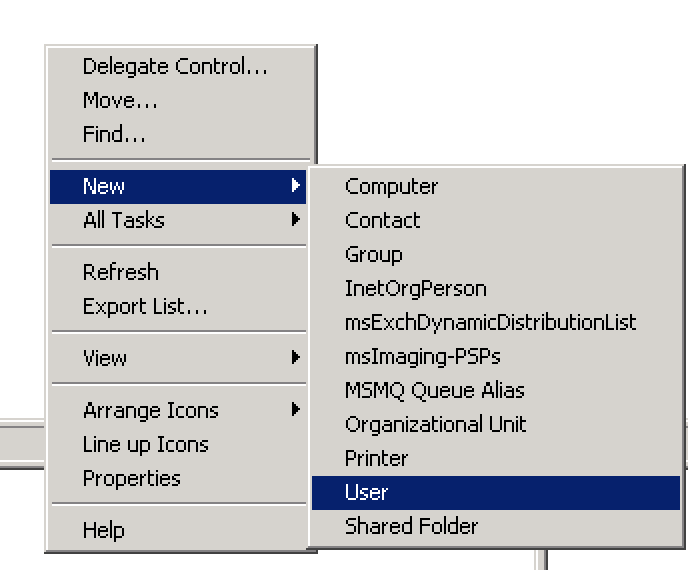
1. From Active Directory Users and Computers, create a new user. This will be the service account for your Palo Alto
- a. Take note of the password used during this process, it will be needed in later steps.
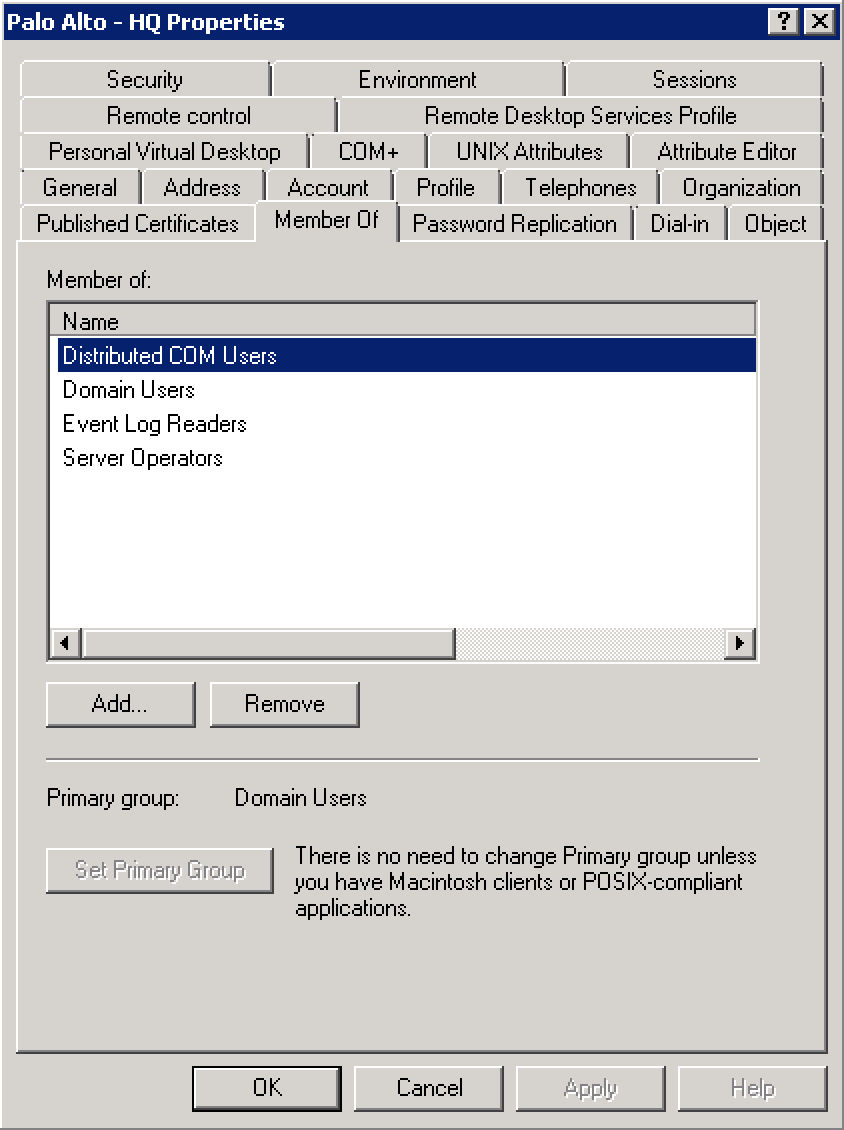
2. Once the user account it created, add it to the following security groups
-
a. Distributed COM Users
b. Domain Users
c. Event Log Readers
d. Server Operators
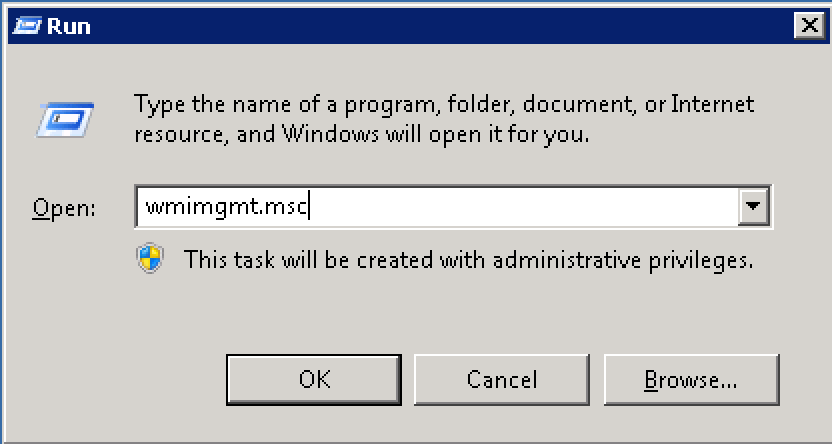
1. Next you will need to make some adjustments in WMI Control.
-
a. Click your Start Menu and run wmimgmt.msc
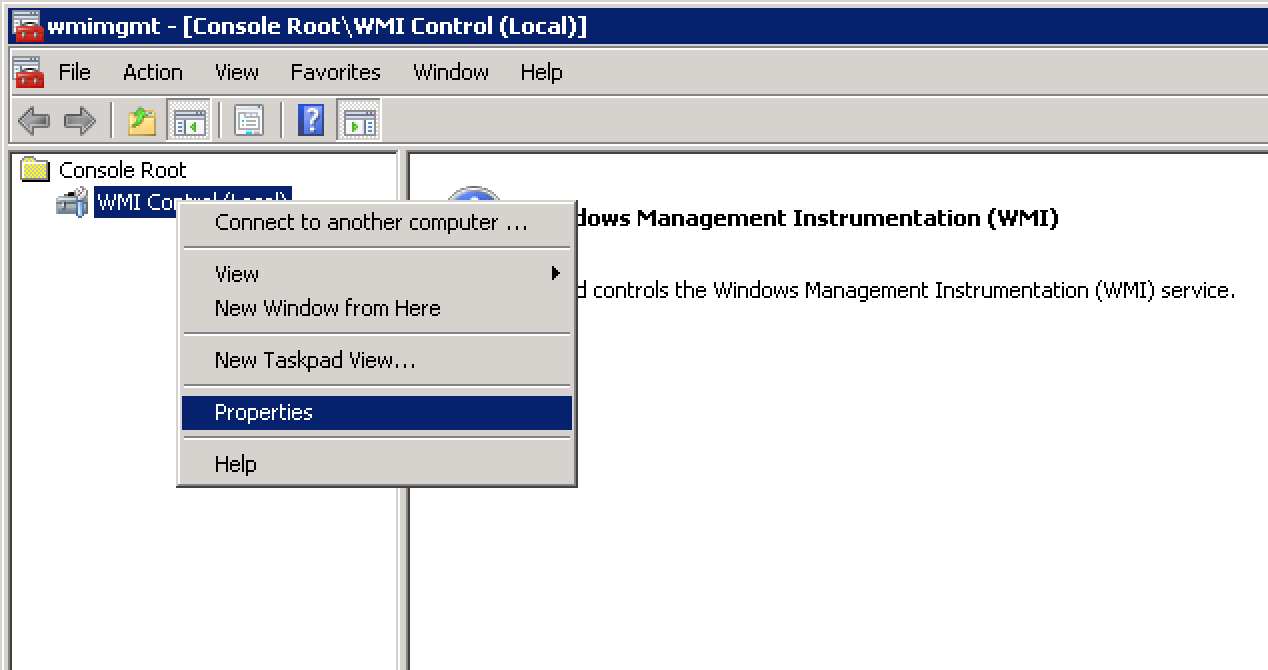
2. Right Click WMI Control (Local) and select Properties
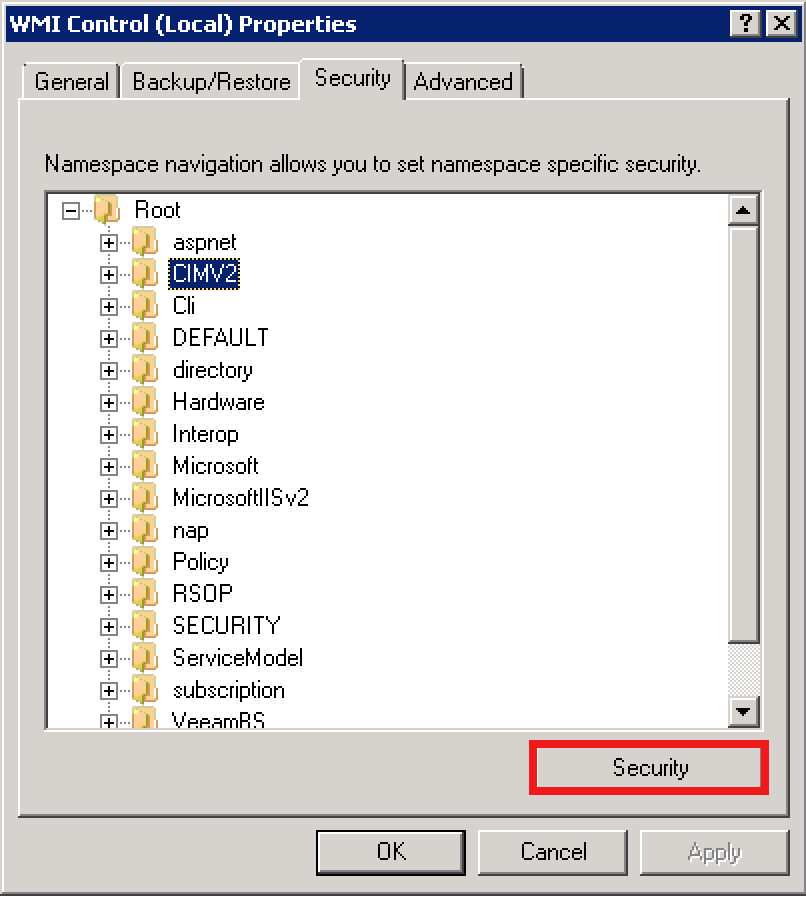
3. Expand Root then highlight CIMV2 and click the Security button below
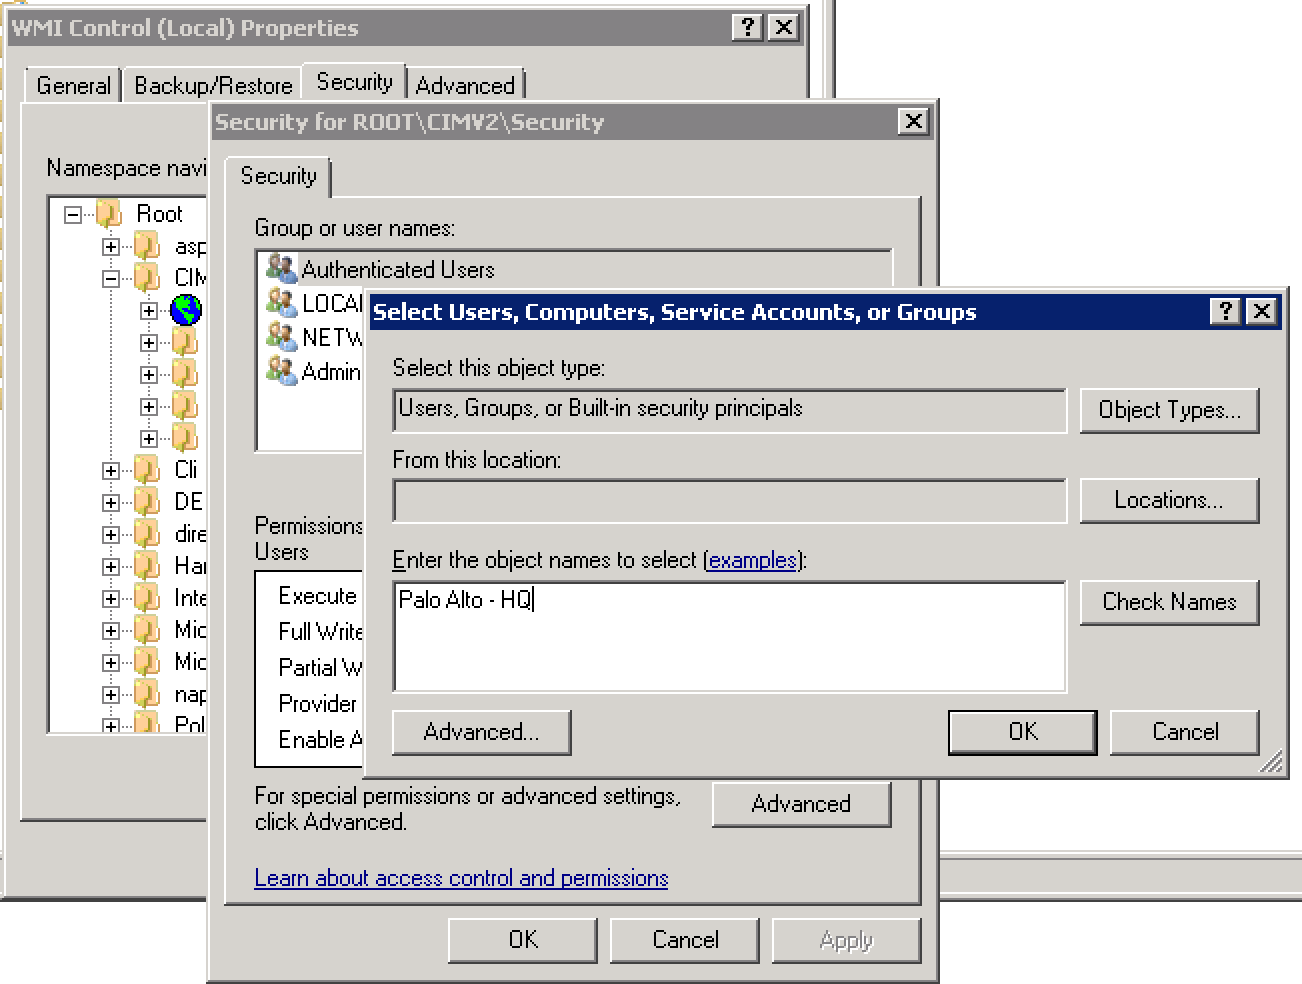
4. Click the Add button and add the Service Account that you just created
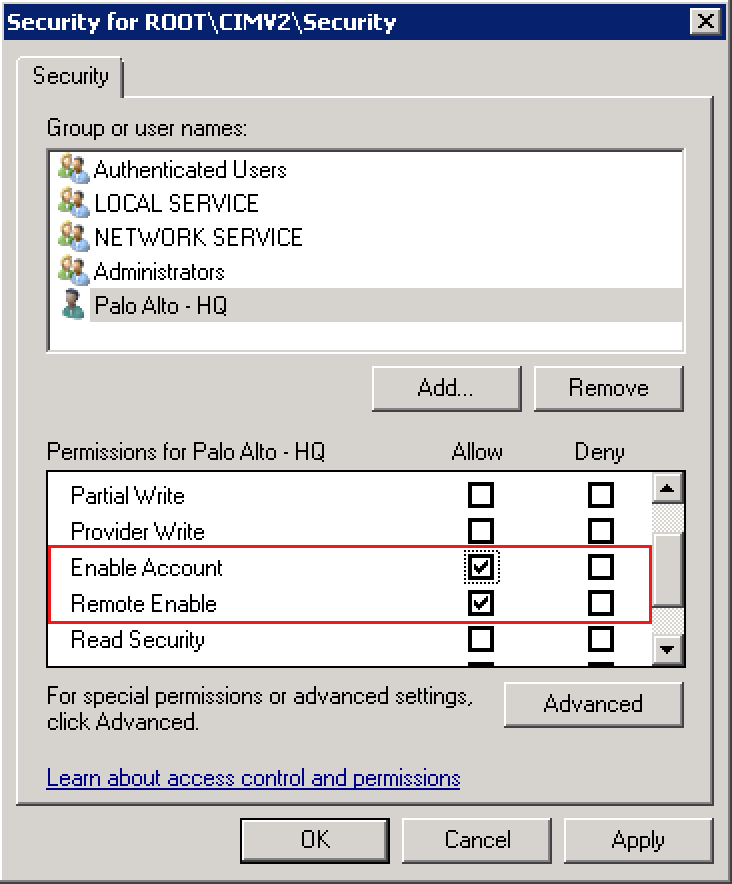
5. In the Allow Column check Enable Account and Remote Enable, then click OK
6. NOTE: You will need to repeat the steps above in each Domain Controller in your environment
Once the Service Account and Domain Controllers have been configured, the account and servers can be added to the Palo Alto configuration.
1. Log in to the web interface of the Palo Alto firewall
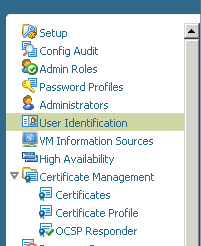
2. Under the Device tab, select User Identification
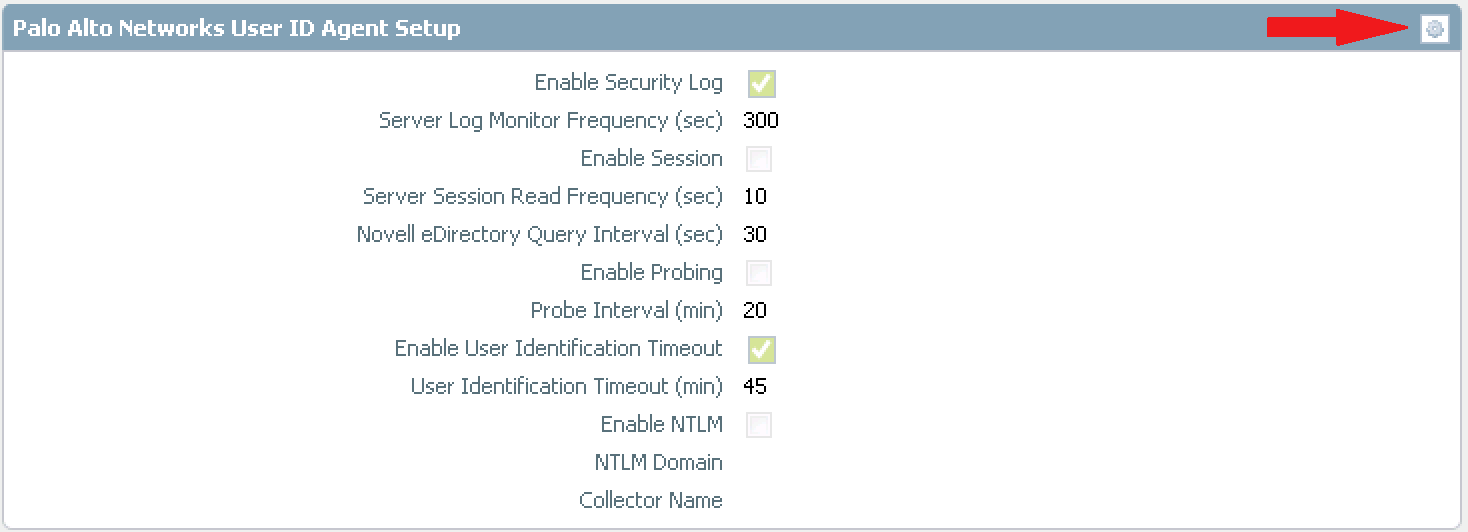
3. Under the User Mapping tab in User Identification, click the edit button for Palo Alto Networks User ID Agent Setup
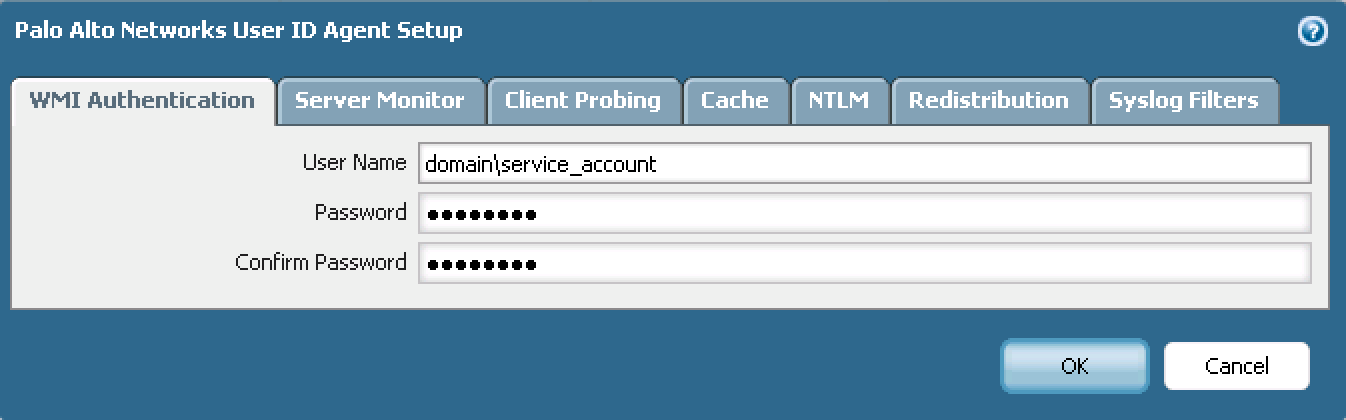
4. Enter the user ID and password of the Service Account created in steps above, then click OK
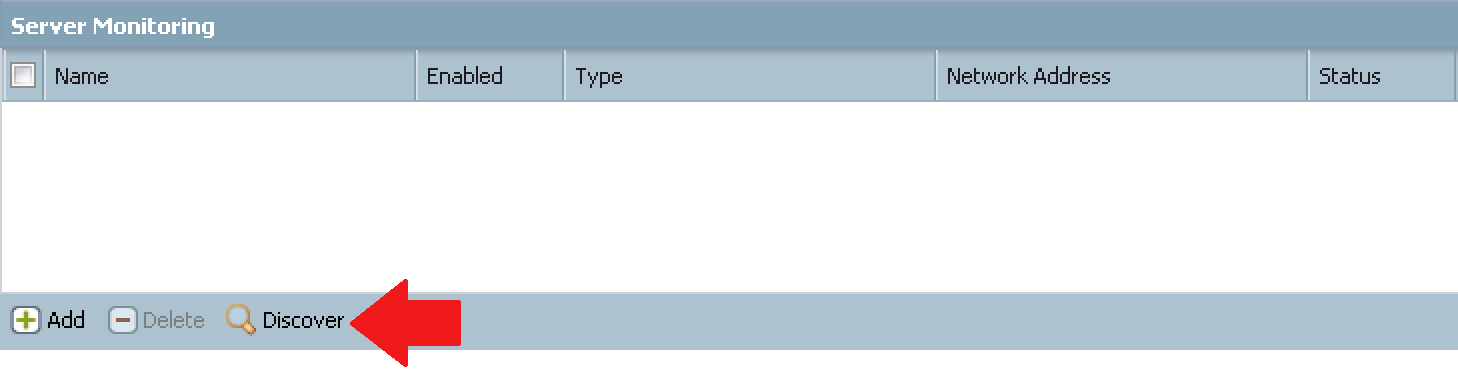
5. Once the account information has been entered, use the Discover button under Server Monitoring to add your Domain Controllers to the configuration
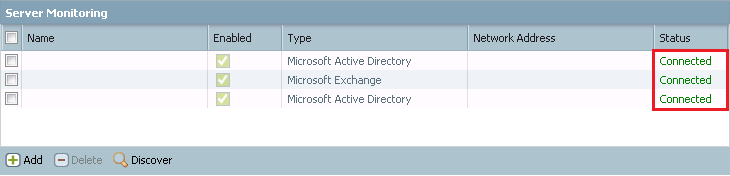
6. Once the Domain Controllers are added, commit your changes and verify the servers are showing a status of connected. When connected you can create reports and policies with specific user data.
