Are you a big enthusiast about the Star Wars franchise? Watched every episode? Dressed up as Luke Skywalker? Princess Leia?
This blogs for you!

Using Telnet Protocol, we can watch the Star Wars IV movie! Well, at least 30 minutes of it. The ASCII version of Star Wars begins where Obi-Wan Kenobi heads off on his own in the Death Star to locate the tractor beam.
What’s Telnet you say?
Telnet was created back in 1969 when internet was not common. Telnet was used to communicate between two systems.
For our use, the telnet protocol will allow our computer to connect to the remote telnet server and run the application (Star Wars IV) on that server.
Is it Safe?
Telnet was designed to work within a private network and not across a public network where threats are present. Because of this, all the data is transmitted in plain text, including passwords.
“The Force is strong with this one.”

Don’t worry, when you hear that telnet is unsafe, this is referring to running telnet as a server. This means allowing clients to connect to your telnet server and performing actions. This is bad, very bad!
In our situation, we can watch this ASCII version of Stars Wars in two ways:
1. Use the telnet client installed our computers, or
2. Install a telnet client such as PuTTy to watch the movie.
1. Using ‘Windows Features’ to turn on Telnet Client.
- a. Start > Control Panel > Programs and Features > Turn on Windows Feature off or on.
b. Locate Telnet Client and make sure the checkbox is selected and press OK.
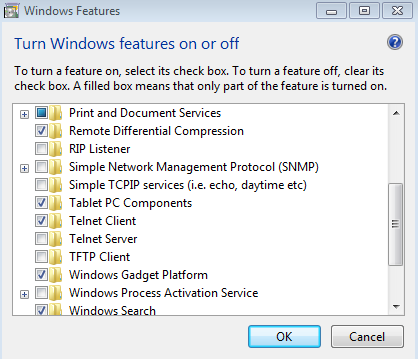
- c. Windows will take a minute to make changes.
d. Open command prompt: Start > search: cmd.
e. Inside command prompt, type: telnet towel.blinkenlights.nl

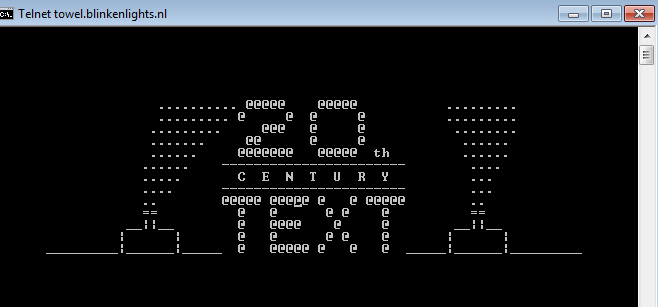
- f. Click Enter and Enjoy the Show!
g. Remember for security purposes, disable Telnet Client in ‘Windows Features’ when you’re done enjoying your movie.
2. (Alterative & Preferred) Using a 3rd party telnet client, like PuTTy!
- a. Assuming you are on Windows, download the putty.exe for Windows on Intel x86.
i. Here is the Download link if you want to use this option: http://www.chiark.greenend.org.uk/~sgtatham/putty/download.html
ii.
b. Run the PuTTy.exe file
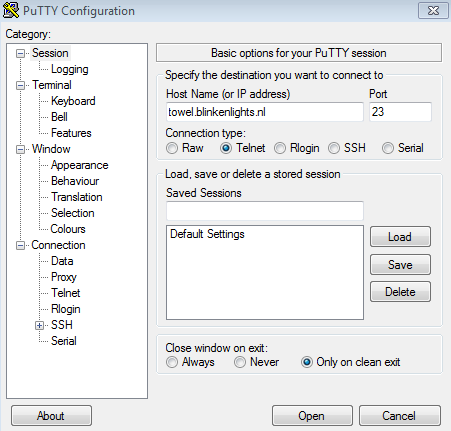
c. You should get a box like this when you run the file.

- d. In the Host Name (or IP address) text box, insert: towel.blinkenlights.nl
e. For the Connection type radio button, select Telnet.
f. Press Open and enjoy!